
How to make bread with yeast 3
I have shown two similar recipes here on how to make bread with yeast but with improvements from previous recipe. They are provided as examples of water content and ease of making. Just a note, just before you do any food preparation and cooking do wash your hands thoroughly with soap and running water. This will reduce the chance of contaminating your food with germs and unwanted dirt that may make your food horrible to taste. Having said that let us continue on how to make bread with yeast part 3.
how to make bread or yeast leavened wholemeal bread 3– The Accidental Recipe
Sunday 27th March 2011 Recipe 20110327
Molasses (treacle) is an excellent source of trace minerals and I suspect it is a good source of soluble fibres. Furthermore, the molasses act as a nutrition source for the yeast. In a previous experimental recipe, I had 5% molasses and the bread turned out quite well but it had a very strong molasses aroma and the corners of the loaf started to caramelise or burn and became very hard. I have reduced the molasses content and removed the sesame seeds. This recipe is based upon the accidental recipe on how to make bread with yeast, with minor adjustments. I was just trying to increase the water content in the accidental recipe to verify that recipe. Here is how to make the bread with the latest recipe:-
The bread recipe for how to make bread with yeast
| Item | Ingredients | Percentage(%) | Weight(g) | Weight | |||
| lbs. | oz. | ||||||
| 1 | Bread Flour | 100 | 600 | 1 | 5.12 | ||
| 2 | Instant Dry Yeast | 1 | 6 | 0 | 0.21 | ||
| 3 | Sugar | 5 | 30 | 0 | 1.06 | ||
| 4 | Bread Improver | 1 | 6 | 0 | 0.21 | ||
| 4 | Molasses | 3 | 18 | 0 | 0.63 | ||
| 5 | Water, Cold | 100 | 600 | 1 | 5.12 | ||
| 6 | Salt | 2 | 12 | 0 | 0.42 | ||
| 7 | Bread Softener | 4 | 24 | 0 | 0.84 | ||
| 8 | Bran | 15 | 90 | 0 | 3.17 | ||
| 9 | Wheat Germ | 4 | 24 | 0 | 0.84 | ||
| 10 | Shortening | 3 | 18 | 0 | 0.63 | ||
| 11 | Poppy Seeds | 5 | 30 | 0 | 1.06 | ||
| 12 | Flax seeds | 5 | 30 | 0 | 1.06 | ||
| 13 | Sunflower seeds | 5 | 30 | 0 | 1.06 | ||
Photos on how to make bread with yeast
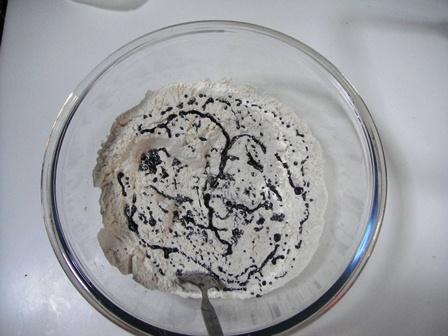
This is how to make bread with yeast. Mix the flour, bread improver, sugar, yeast with a metal spoon by stirring them a few times to ensure proper dispersion of the sugar and yeast in the flour. Then drip the molasses all around the flour mixture to spread it across the flour.
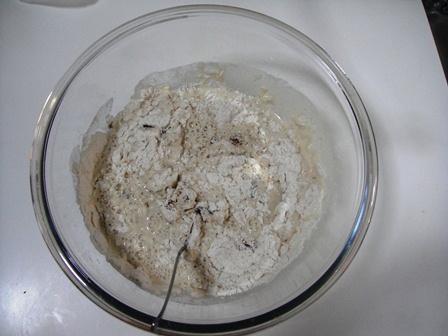
Then add all the cold water (10’C), in one go, and fold in the flour with a spoon, a few times. The mixture will form a firm lump. Notice I am using a spoon to mix and not my hands.
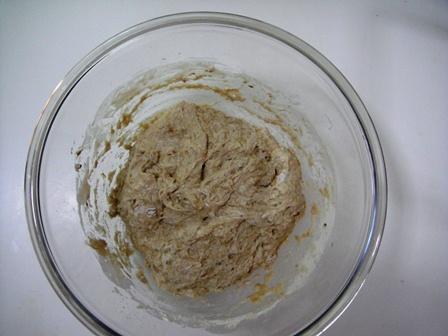
Make it into a round lump and leave it for 4 hours. Easy isn’t it? This is the easiest way how to make bread with yeast.
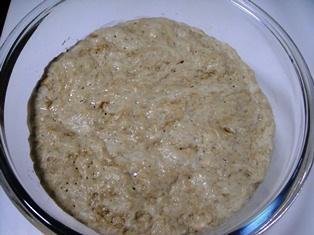
After 4 hours. You can see from the before and after pictures that the bread volume has increased by about 3 to 5 times. The dough has risen to occupy most of the bowl.
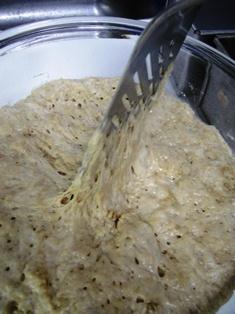
Do note how sticky the risen dough is. At this point stab the sponge with a metal spoon to deflate all the large air pockets.
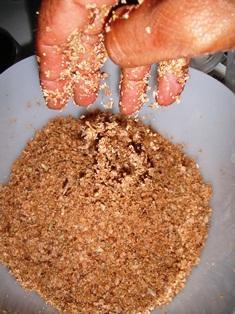
Separately, weigh all the additives and mix them. I prefer to use my hand as the warmth from my hand will melt any shortening and bread softener and ensure all the additives are uniformly distributed. The reason for mixing them separately from the flour, is that as I am only going to fold in the additives into the sponge hence I need to ensure that the additives will be evenly spread out or distributed within the sponge.
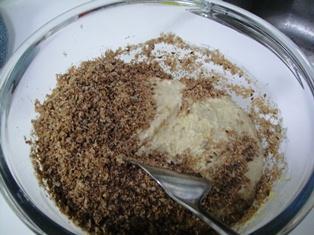
Fold in the additives into the sponge with a large spoon. You will notice that folding in 7 to 20 times will give a very good mix. By the way both my hands are still clean without any sticky dough / sponge on them. Notice that I have not kneaded the sponge at any time.
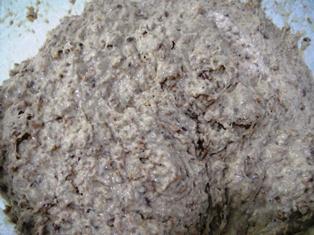
After folding in the additives the dough will look like this. You will notice that the dough is a bit wet. Scoop the dough into the baking trays. With 600g of flour you can make two loaves of bread.
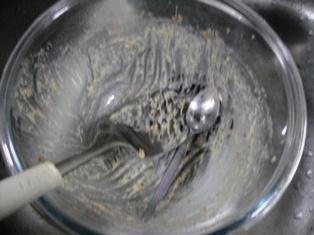
Even though the dough is a bit wet you can easily scoop it out of the bowl. It will come off, almost as one sticky lump. Soak the empty bowl and spoons in water for half an hour or so, so that it will be very easy to wash.
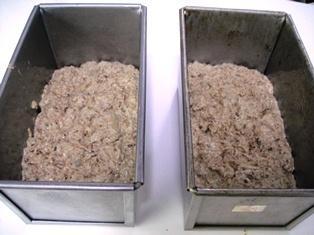
Proof the dough for about half an hour or until it stops rising.
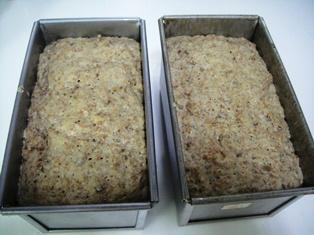
The dough has risen quite a bit, almost to the top of the tins. Bake for one hour at 210’C (410’F). Do note, as I have used high water content in the sponge, the bread will not rise in the oven when baking at 210’C.
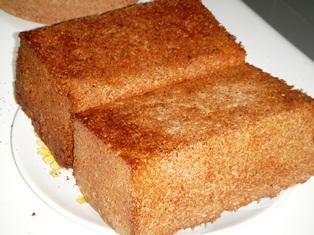
Notice how square the loaves are or rather the corners are rather sharp. This is due to the high water content in the dough which allows it to flow into the corners before it sets into bread.
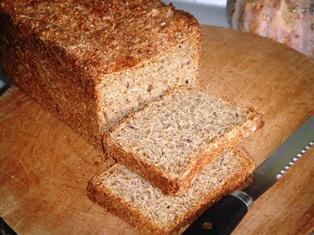
The sliced bread … and that is how to make bread with yeast.
How to make bread with yeast, leavened wholemeal bread 4– The Accidental Recipe
Friday 1st April 2011 Recipe 20110401
When I looked back at all the experiments I had carried out I realised that I had accidently ‘discovered’ how to make bread with yeast a different way. The standard methods on how to make bread with yeast are the
1. Straight Dough Method
2. Sponge & Dough Method
I had explained both methods on how to make bread with yeast in an earlier article. I would like to call this accidental method the
3. Sponge & Additives Method
It does look like an in between method but there are some basic differences which was the result of trying to lower the materials cost of the bread and yet keep the good qualities of the standard methods. Actually, I was trying to find the point at which I could cheapen the bread with more and more water before it would not rise during fermentation or proving. That point is at about 100% to 120% water to flour by weight.
The differences on the methods of how to make bread with yeast
1. Technically, the dough would be classified as a batter and not dough as there is an equal amount of water by weight as there is flour. In fact you can go to 120% weight of water to the weight of flour. There is a good website you could check for the ‘rules’ and tips for baking and it is at http://www.baking911.com/howto/how_baking_works.htm . Almost everything you want to know about baking …etc can be found at this site. You will notice that Sarah & Kelly define the bread dough as drop, soft & stiff. And pour batter as equal amounts of liquid to flour. I suspect that it is the way I am mixing the flour and water that helps to keep it looking like a dough instead of a batter (at 100% water to flour). It’s not dry enough to be dough but not yet wet enough to become a batter which can flow. It is very gluey but not sticky yet, at least to the metal utensils used.
2. When you try to learn how to make bread with yeast by this method you do not need a bread making machine or any other mixer, to make this type of bread. All you need is a spoon, a weighing scale, a bowl and an oven.
3. The best thing about how to make bread with yeast by this method is that you do not need to knead the dough. Kneading dough can be difficult if this is your first attempt at baking. With this no knead method you do not need strong enough muscles in your wrist, arms and shoulders. Actually, I like to say that ‘auto-kneading’ is taking place. That is the dough is kneading its self even though I cannot prove that this is true. I will explain this later.
4. In this method on how to make bread with yeast, sugar is introduced into the Sponge to increase the aromatics and flavour of the bread and not as a sweetener.
5. All flour is mixed upfront with the yeast unlike the Sponge & Dough method.
6. The only disadvantage of this method on how to make bread with yeast, is you cannot shape the dough by hand. It will take the shape of the container you use to bake it. But what the hell when you can make cheap high quality bread at home with a spoon, a mixing bowl and without any effort – no kneading.
How or why does it work?
I’m not a professional baker or a food technologist, I am not even an expert on how to make bread with yeast, so I do not know how to test and prove that what I am about to tell you is correct. So do try it out yourself and verify for yourself what I write here.
1. The mixing.
Let us go back to the standard methods. Take for example the Sponge & Dough method. You would add about 60% to 70% water to a flour and yeast mixture. Then you mix them. If you do not use a machine to mix but mix by hand you will notice that the mixture becomes dry at first as all the water is absorbed within the flour, the first stage of mixing. Don’t use a spoon or any other utensil as you want to feel the mixture with your fingers. Then as you keep mixing by hand, you will feel the dough becoming wet or damp, the second stage of mixing. If you keep mixing it further it will become sticky, the third stage of mixing.
Let us say, the first stage is when millions of tiny packets of water are absorbed within the flour. It is like the surface tension is strong enough to sustain tiny packets of water resulting in the water being inside the flour. As you mix further, the second stage begins, that is when the tiny packets of water are beginning to be released or break and begin to ‘swamp’ the flour particles. The mixture begins to feel damp or wet. The third stage is when all the water packets are broken the flour is in the water. The dough becomes sticky. It may even become watery if excess water is present making it a batter.
What I am trying to achieve is to stop just after the first stage and the easiest way to do this is to use a spoon and fold in the flour mixture on its self.
Don’t worry if the sponge mixture doesn’t look well mixed. I will tell you about auto-mixing later. That is where the sponge mixes its self. This is the easiest method to use when you are learning how to make bread with yeast.
2. Fermentation
Don’t worry if the freshly folded mixture looks a bit wet. I have noticed that if you allow the fermentation to go the full four hours it will look drier and can be scooped up with you hand. The stickiness will almost disappear until you try to re-mix the fermented sponge. With a water content of 100% the sponge with bloat to 3 to 5 times its original size. With 120% water content the sponge will just about double in size as the higher water content makes it easier for the gases to escape from the sponge.
3. Proofing
Always proof the dough in the baking tin as it will be ‘difficult’ to handle the sticky dough. This stage is critical because the dough, generally, will not rise during baking and especially if you are using 120% water recipe. From the experiments I have run, I have noticed that half an hour of proofing gives all the rise you can get from the dough. It will not rise much further after half an hour unless you add some more sugar. Note I am doing this in Malaysia, a hot and humid country. If the dough does not rise at this stage either there is too much water in your dough and the gases given off by the yeast have risen to the surface and bubbled off, escaped. This means your dough was too watery and not gluey enough. Or you may have not added enough sugar so the yeast has run out of food and hence stopped producing gases to raise the dough. Or you are doing this in a very cold room so do give the yeast a little more time.
4. Baking Time
Unlike standard dough that contains 60% to 70% water, the 100% to 120% water recipes need a much longer cooking time. The standard dough can be baked within 20 to 30 minutes. But the high water content recipes need one hour bake times. I wonder if there is an algebraic formula that predicts baking time to water content for my baking tin.
Let’s work out a formula, it may be wrong but let’s have some mathematical fun. Writing in the general algebraic form y = mx + c for linear equations (assuming linearity). All data is based upon 210’C bake temperature.
30 minutes = 62% water*m + c
60 minutes = 100% water*m + c
Subtracting,
m = 30/38 …. m = 0.789 (or m = 0.8 for easy calculations)
substituting m back into the equation to find the value of c.
c = 60 – (0.789*100) = -18.9 (or we could use 19 or 20 for an approximation)
Bake Time = Percentage of Water * 0.789 – 18.9
If water content is 70% then bake time is 36 minutes.
If water content is 120% then bake time is 76 minutes (about 1 and a quarter hours)… mmm… I must try this out.
For simple approximate calculation you could use
Bake Time = (Percentage of Water * 0.8) – 20 … in minutes
This equation is for a bake temperature of 210’C (410’F) and for a bake tin size of 8 inches (20cm) long by 4.25 inches (11cm) wide and 4 inches (10cm) deep. If you use this equation and if your bake time is long do check every so often then your bread is not burning. Furthermore, as many people have gas ovens, all my experiments are done with only the bottom heater/burner on and baking on the second shelf from the bottom. I must tell you that I baked the bread for one hour instead of 76 minutes. May be I should have tried baking for 76 minutes.
5. Auto-Kneading & Auto-Mixing
I guess you are shocked to hear about auto-mixing and auto-kneading where by the sponge or dough mixes and kneads its self. No one seems to mention it when they show you how to make bread with yeast. It’s a fantastic concept if I could prove it to be true and probably has many commercial applications. But, alas, I’m not a food technologist and neither do I have a microscope.
If you have tried any of my recent recipes, I think you will notice that when you fold in the flour, yeast, sugar, molasses and water mixture it may not looked well mixed. But when you wait the four hour fermentation period the sponge looks much better mixed. I suspect that as there is plenty of water in the 100% water recipes there is a lot of freedom for the yeast to move around. In the process of moving around the yeast is actually mixing the sponge for you! That is auto-mixing.
Auto-kneading is very much similar. The ‘rustic’ or coarse or rough nature of the final bread can be for two reasons. Firstly, the high water content may be bringing out a lot more gluten then for the standard recipes. Secondly, as the yeast moves around and grows it bumps into many of the protein particles and thereby bringing about a kneading type of action but at a microscopic level with billions of them swishing around in the tasty soup you have provided them. Thirdly, if you had the chance to observe the 120% water recipe fermenting, you would have noticed that the sponge is ‘breathing’. It rises a little, stretches, then drops back a little, contracts, and keeps repeating this process. This is due to the yeast generating gases which expand the sponge and when the pressure builds sufficiently the gases escape the sponge and the sponge drops back. This expansion and contraction is a gentle form of kneading. So do not even try to mix the sponge or dough, just fold it on its self. I think this is the easiest technique on how to make bread with yeast – just watch it mix itself and knead itself.
Now I wonder how I could get that amoeba at my kitchen sink to stir me a boiling hot cup of coffee for me every morning.
There are possible ways to reduce the ‘rustic’ or coarse nature of the bread. This can be done by either substituting a certain percentage of the bread flour with high ratio flour (low protein flour). Or by mixing some portion of the bread flour with butter or oil or shortening before making the sponge. But I have not tried these options yet – just having a lot of fun with the rustic wholemeal bread.
The Recipe
Here is the 120% water recipe. Do note that I made this recipe a very basic recipe. It has been stripped of bread improvers and softeners.
| Item | Ingredients | Percentage (%) | Weight (g) | Weight | |||
| lbs. | oz. | ||||||
| Sponge | |||||||
| 1 | Bread Flour | 100 | 300 | 0 | 10.56 | ||
| 2 | Instant Dry Yeast | 1 | 3 | 0 | 0.11 | ||
| 3 | Sugar | 5 | 15 | 0 | 0.53 | ||
| 4 | Water, Cold | 120 | 360 | 0 | 12.67 | ||
| After 4 hour fermentation | |||||||
| Additives | |||||||
| 5 | Salt | 2 | 6 | 0 | 0.21 | ||
| 6 | Molasses | 3 | 9 | 0 | 0.32 | ||
| 7 | Bran | 15 | 45 | 0 | 1.58 | ||
| 8 | Wheat Germ | 4 | 12 | 0 | 0.42 | ||
| 9 | Flax seeds | 5 | 15 | 0 | 0.53 | ||
| 10 | Sunflower seeds | 5 | 15 | 0 | 0.53 | ||
| Total | 260 | 780 |
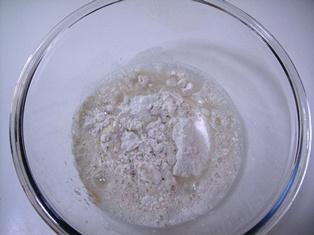
Pour all the water, in one go, into the yeast sugar and flour mixture.
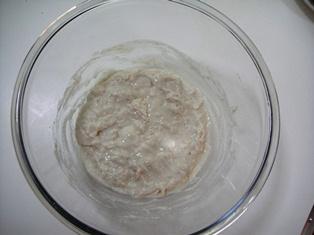
Fold in the mixture on its self and allow it to ferment for 4 hours.
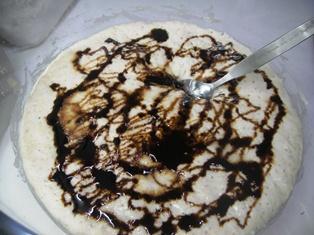
Notice that the sponge did not rise as much as in the case of the 100% water recipe. The molasses should be drizzled evenly around the fermented sponge. Then add in the rest of the additives.
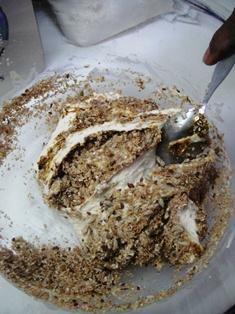
Just fold in the dough mixture on its self. No need to stir or strenuously mix.
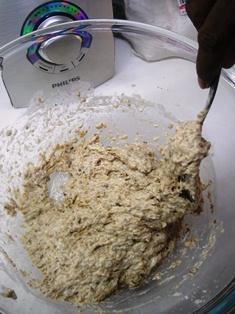
Note how gluey the mixture is. Just fold it in. Did you notice that my hands are clean and free of the dough?
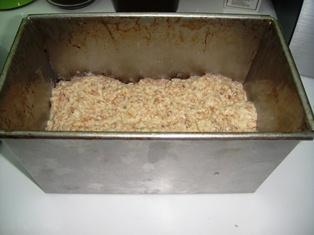
Use the spoon to scoop the dough and place it in the baking tray for proofing. Give it half an hour. The baking tin should be made out of tin and greased. It will be easier for the baked bread to drop out once cooled.
Please do not use Aluminium utensils as Aluminium is a neuro-toxin and may react with some foods to give you food poisoning – it happened to me when I was trying to make an edible form of soap. I have tried to research articles on fermentation and I could not find any conclusive evidence, on the internet, which may cause the yeast switch to generating methanol instead of ethanol, the alcohol in wines, beers, brandy… Methanol is a poison that causes blindness and even death when consumed in large quantities. The only indication may be the use of wooden utensils that can cause the yeast to make methanol but I am not sure whether this is conclusive. In bread making all the alcohol is evaporated away during baking.
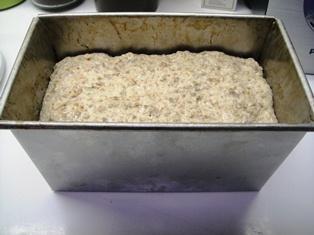
The dough will rise to just about double its original size and not much more within half an hour. Then bake for one hour at 210’C (410’F).
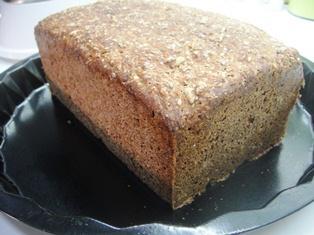
Baked bread. Notice the sharp corners that formed as the dough slowly flowed into the corners.
This bread was a little tougher than previous recipes on how to make bread with yeast, because I left out the Bread Improver and the Bread Softener deliberately to find out how extra water in the recipe would affect the bread. Even though sugar acts as a tenderiser, I do not know whether increasing the sugar content in the sponge would soften the bread as the water content is very high.
You will notice that the bottom of the bread is a bit darker and I would think that the heavier particles managed to settle to the bottom due to the high water content. It would be best to use the 100% water content instead of 120% water content in the recipes.
If you do try the 100% water recipes you will notice that the bread last longer as it takes longer for the water content to evaporate to the point where the bread tastes stale. Notice that I have not used any preservatives hence, preferably, these breads should be refrigerated to discourage mold and fungal growth, if you are going to keep the bread for more than 3 or 4 days.
You could substitute some of the water with milk and eggs, weight for weight to increase the nutritional value of the bread. I didn’t use any milk or eggs as I wanted to show you how to make bread with yeast with a simpler recipe.
This is how to make bread with yeast using the minimum of equipment. I freely give you these techniques, on how to make bread with yeast, so that you too can show and teach the poor, the needy and the unfortunate. This will enable them and their children to have ample supply of easy to make, low cost nutritious bread because when you are on a poor quality diet you will find it harder to work (to earn a living), to learn and study, and to come up in life.
This article How to make bread with yeast 3 was researched and written by Peter Achutha
Leave a Reply